Fabric Decollage Gallery
- Pillows -
This is my first pillow featuring hand painted fabrics.
More to come, because this was fun to make!
These images are copyright protected by Debbie Jones, 2025. All rights reserved.
These images are copyright protected
by Debbie Jones © 2025. All rights reserved.
Please do not use these images or designs in any way without Debbie's written permission. Thanks!
(Note: Simplicity patterns are copyrighted
by that company.)
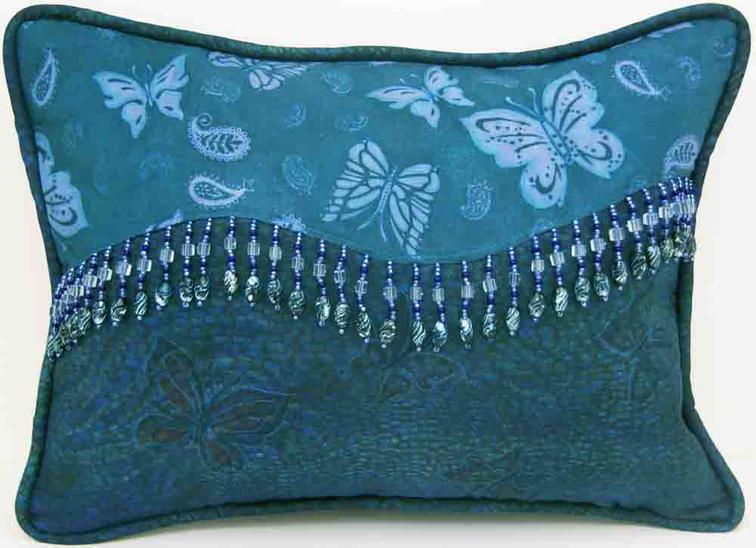
Butterfly Pillow
I bought a pillow form already filled with stuffing, then made the pillow cover using two of my hand-painted cotton fat quarters (18"x22") for the front and piping around the outer edge, and one hand-painted silk fat quarter for the back. I chose fabrics from my stash that coordinated with the beaded fringe that was purchased long ago.
First, I took the measurements of the pillow form, 12"x16", and drew this on a large piece of paper. I drew a curved line on the paper, and then cut on the curved line to make a two-piece pattern. Next, I positioned the top pattern piece on my fabric to get the desired section of butterflies showing, and then cut the fabric following the pattern, adding a couple extra inches on all sides where possible, to allow for quilting.
For the bottom portion of the pillow, since there were no butterflies printed on that fabric (I traced those later, see below), I placed the bottom pattern piece along one edge of my fabric, thus saving as much fabric as possible for the piping. Then I cut the fabric following the pattern, adding a couple extra inches on all sides where possible, to allow for quilting.
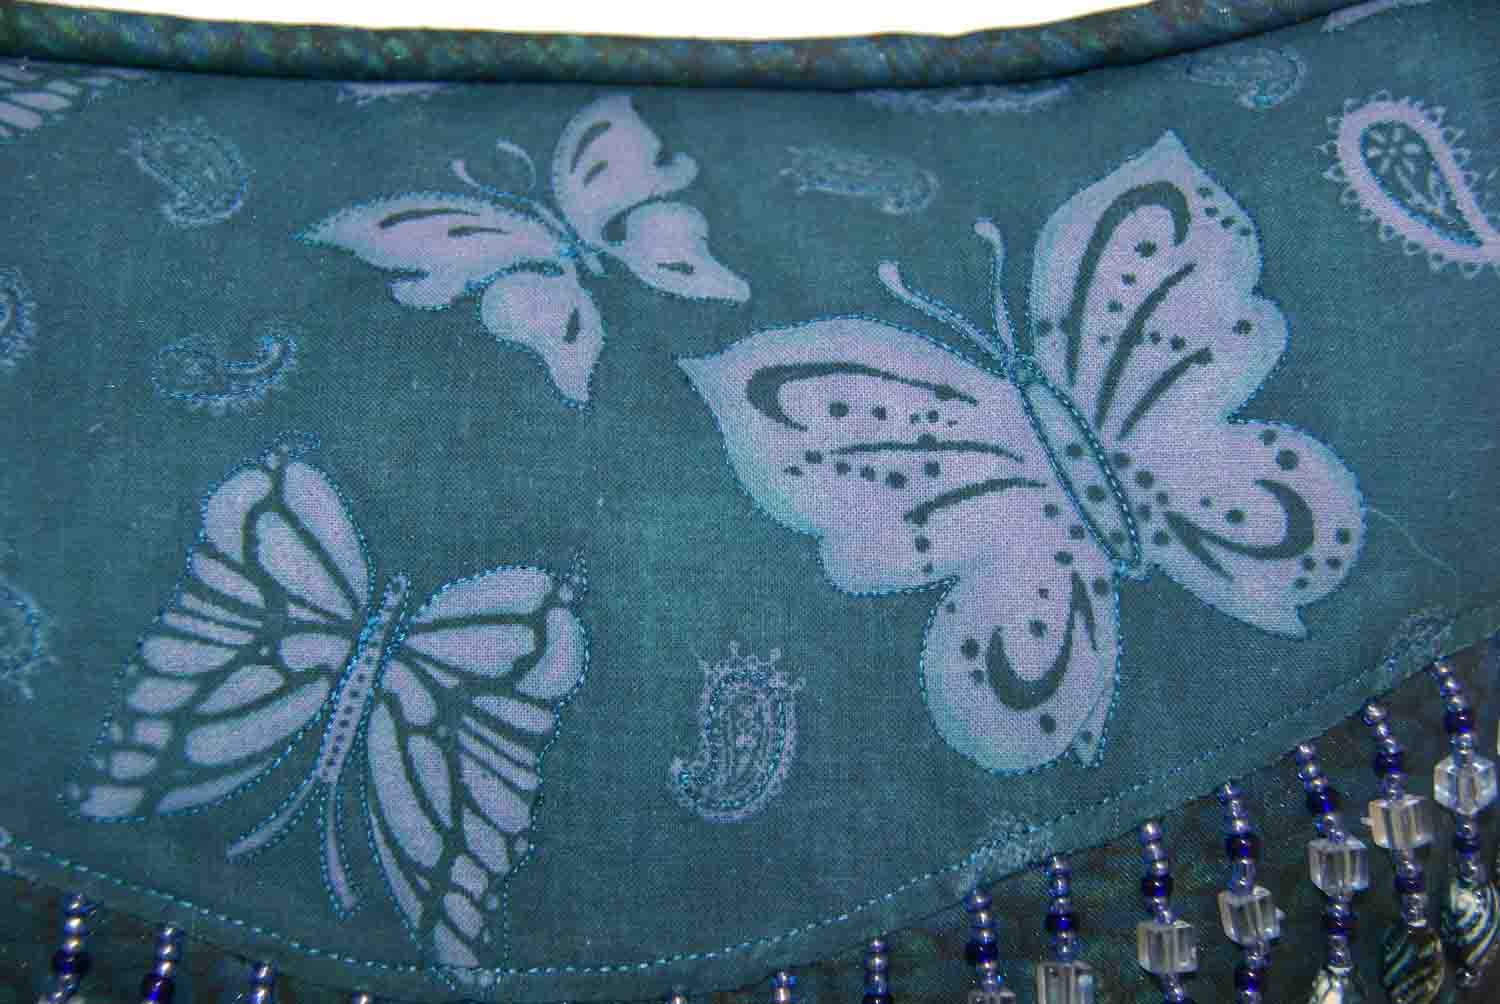
Next, I traced some butterfly shapes from the top fabric onto the bottom fabric, using a light box and a wash-away chalk pencil. (You could tape the fabrics to a sunny window, or place a light under a glass-top table for tracing if you don't have a light box.)
I cut two pieces of cotton quilt batting the same size as my two fabrics and then machine quilted around the butterfly and paisley motifs using rayon and cotton threads. Nothing fancy, I just wanted to outline the shapes. Then, from the back side, I trimmed away the excess batting close to the quilted lines, so my quilted motifs stand out. At this point, I ironed fusible cotton interfacing to the back side of both pieces of quilted fabric for stability (this is optional, you may prefer not to cut away the excess batting and omit the fusible interfacing).
To add definition to the butterflies, I used Derwent Inktense Pencils to shade the edges. You could use any colored pencils or crayons for this, but be sure to heat set the shading in case you ever want to wash the pillow. If you use Inktense Pencils, you won't need to heat set it.
Then I placed the paper patterns over the fabrics and re-cut the two fabric pieces along the curved edges only, allowing a 1/2" seam allowance on all sides.
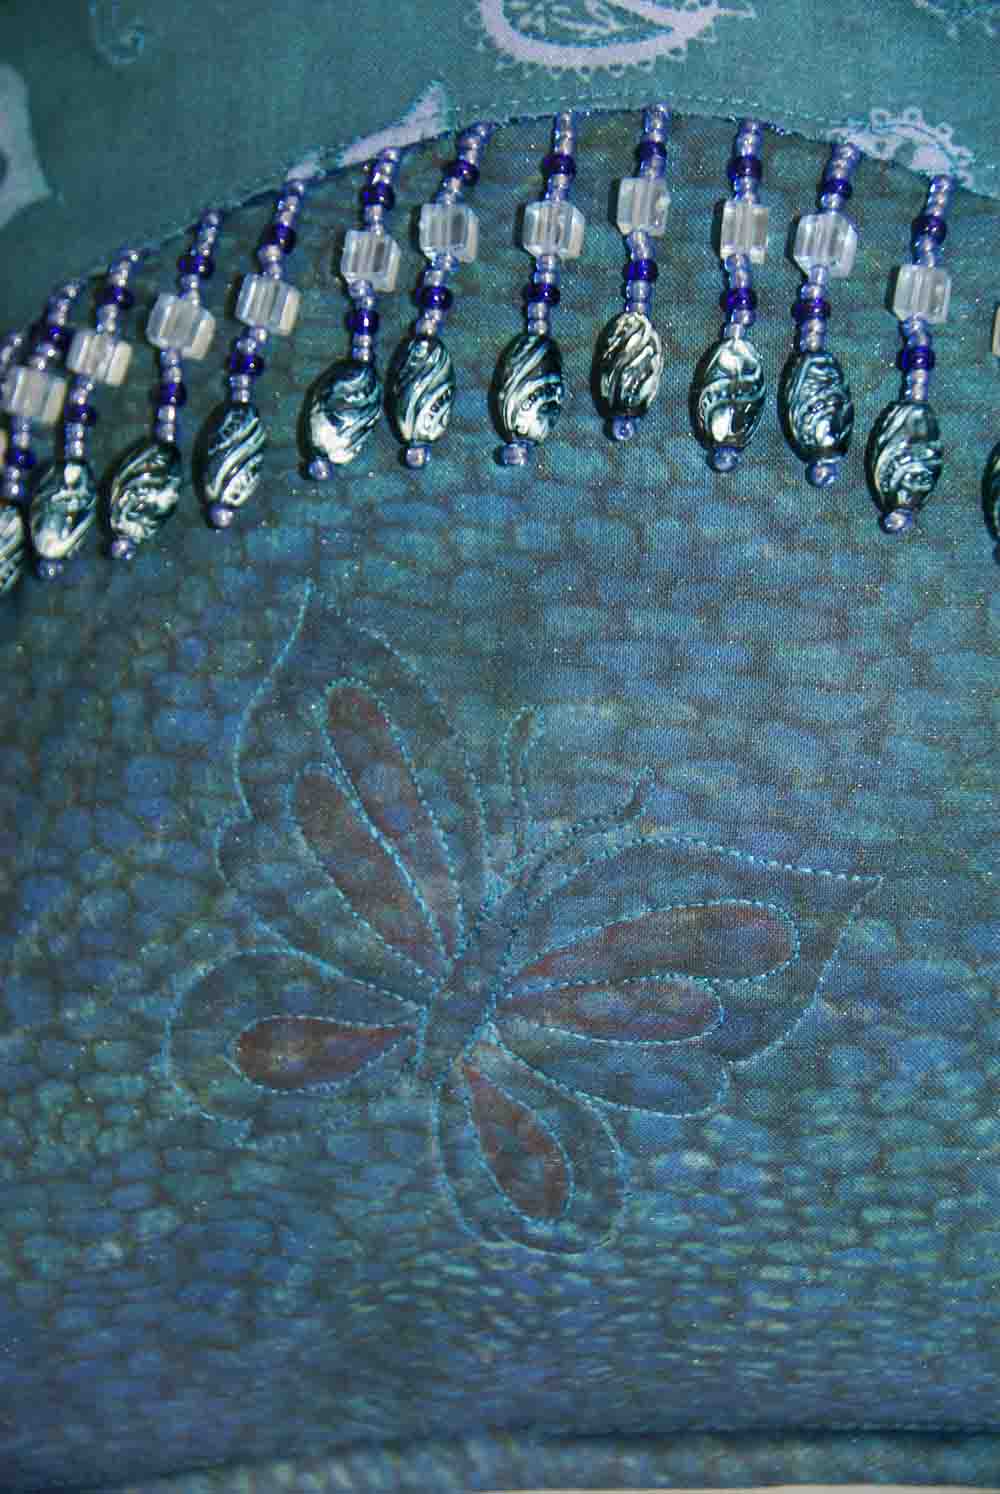
I pinned the ribbon portion of the beaded fringe to the upper part of the bottom fabric, placing the ribbon so the 1/2" stitching would hide the ribbon but not run over the beads, and then machine stitched it.
On the top fabric, I turned under 1/2" seam allowance along the curved edge and pressed it with an iron. Then I pinned the top fabric's curved edge in place over the bottom fabric's curved edge and carefully machine stitched it into place, using a zipper foot and needle positioning so I could get close to the edge, as shown in the close-up photos. From the back side, I trimmed away excess seam allowance and clipped curves as needed, being careful not to cut through the stitches holding the beaded fringe together. (I did cut through the ribbon but not through the stitches holding the beads together.) Since pillows can get a lot of wear, I chose to hand stitch the outer edge where the top fabric meets the bottom fabric, just above the beads. This was optional, but I wanted to be sure the beads don't come loose over time.
The pillow top was finished, so I re-cut it to be 13"x17", which allowed a 1/2" seam allowance on all sides (12"x16" finished pillow size).
Butterfly Pillow, top front close-up, highlights the quilting and shading.
Butterfly Pillow, bottom front close-up,
highlights the quilting and shading.
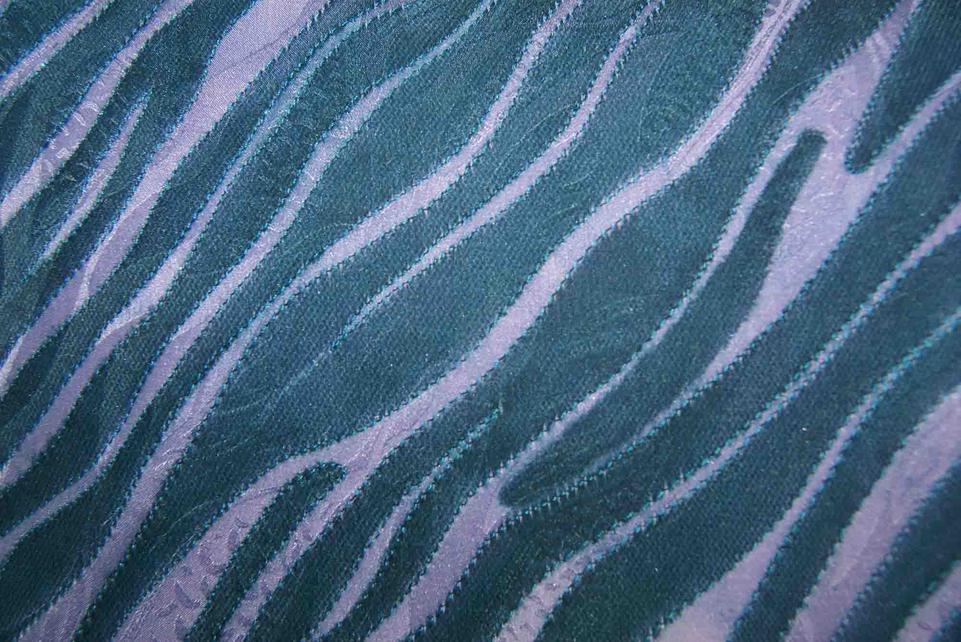
Butterfly Pillow, back side close-up, highlights the quilting on 100% silk hand-painted fabric.
For the back side of the pillow, I chose a 100% silk jacquard hand-painted fat quarter (18"x22"). Since fabric sometimes shrinks up a little when quilting, I recommend fusing the entire fat quarter to a piece of batting cut slightly larger. (I prefer Heavy-Duty Wonder Under fusible web without using steam; just iron the silk fabric to the batting for stitching. Or, you could spray baste it instead. I didn't baste it at all, but silk is easier to work with if basted.) I used rayon and cotton threads to machine quilt around the designs on the fabric, starting in the center and working outward. I love the luster and softness of silk in a quilted project! After quilting it, I cut the fabric piece to 13"x17", which allows for 1/2" seam allowance on all sides, for a 12"x16" finished pillow size.
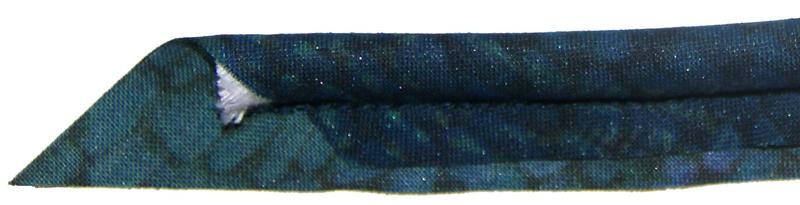
To make the piping, I purchased 2 yards of 1/4" diameter cording at the fabric store. (For other size pillows, measure the outer circumference of the pillow and add at least 6" more to allow for overlap and corners.) I took the leftovers of one fabric used on the front side, and cut 1-1/2" bias strips (at a 45 degree angle to the selvedge), and then stitched these strips together and pressed the seam allowances open. I folded the fabric strips over the cording, trying to center the cording inside the fabric strips, and used a zipper foot, positioning the needle so I could stitch very close to the cording. (You can omit the piping, or buy pre-made piping at the fabric store, if you prefer. Or, search online for free videos and instructions for making your own piping.)
With the piping made, I pinned it to the pillow top (starting at the bottom), with raw edges of both piping and pillow top pinned together and the piping toward the inside ofthe pillow. I left a 3" or longer "tail" of piping unpinned and hanging free at both the beginning and the end, to splice them together later. I was careful that the stitched line of the piping lined up with the 1/2" seam allowance on the pillow top. At the corners, I eased the piping in (not pulling it taut), to allow for turning inside out when finished. It helped to clip the seam allowance of the piping in several places as I pinned, so it turned the corners easier. I was also very careful not to pin where I would stitch over any beads that were close to the stitching line, and very carefully cut off a couple of beads that were too close, making sure to secure the spots where the bead fringe had been sewn to the ribbon so it didn't unravel.
Next, I machine stitched the piping to the pillow top, leaving 3" of the beginning of the piping free. I used a zipper foot and positioned the needle to stitch a 1/2" seam, very close to the piping (try not to stitch into the piping itself), sewing slowly and carefully around the corners, pivoting when necessary. When I got about 6" from the end, I stopped sewing. Then I laid the beginning and end pieces of the piping together to match up, measured and cut the cording only (not the piping fabric) so the ends met. I put a little piece of tape around the ends so they would stay together. Then I trimmed both ends of the piping fabric so they overlapped each other approximately 1". I folded the edge of one fabric under 1/2" and pulled that over the other end of the piping fabric, so it all fit together nicely. I didn't stitch the two piping ends together, but did stitch just on the cording, right next to it. Then, I pinned it to the pillow top smoothly so there were no puckers and stitched it to the pillow top.
I pinned the pillow back to the pillow top, right sides together and stitched along the edge with a 1/2" seam allowance, starting atthe bottom and leaving approximately 10" unsewn at the bottom (room to insert the pillow form). Again, I was very careful not to sew over any beads that were close to the stitching line. After trimming the excess seam allowance, and clipping the corners, I then sewed a 9" zipper in the opening, first on one side, then unzipping it and sewing it to the other side. I turned the pillow cover right side out, zipped it shut and hand-sewed shut the extra bit that was still open near the top and bottom of the zipper. (This was the first zipper I had sewn in many years and had almost forgotton how, and admit there may be an easier way to get that zipper in!) You can omit the zipper and just hand-sew the opening shut, if you prefer. Many pillow forms are washable, and you could just wash the whole pillow if needed.
Here is the back side of the finished pillow:
Piping, one end, close-up
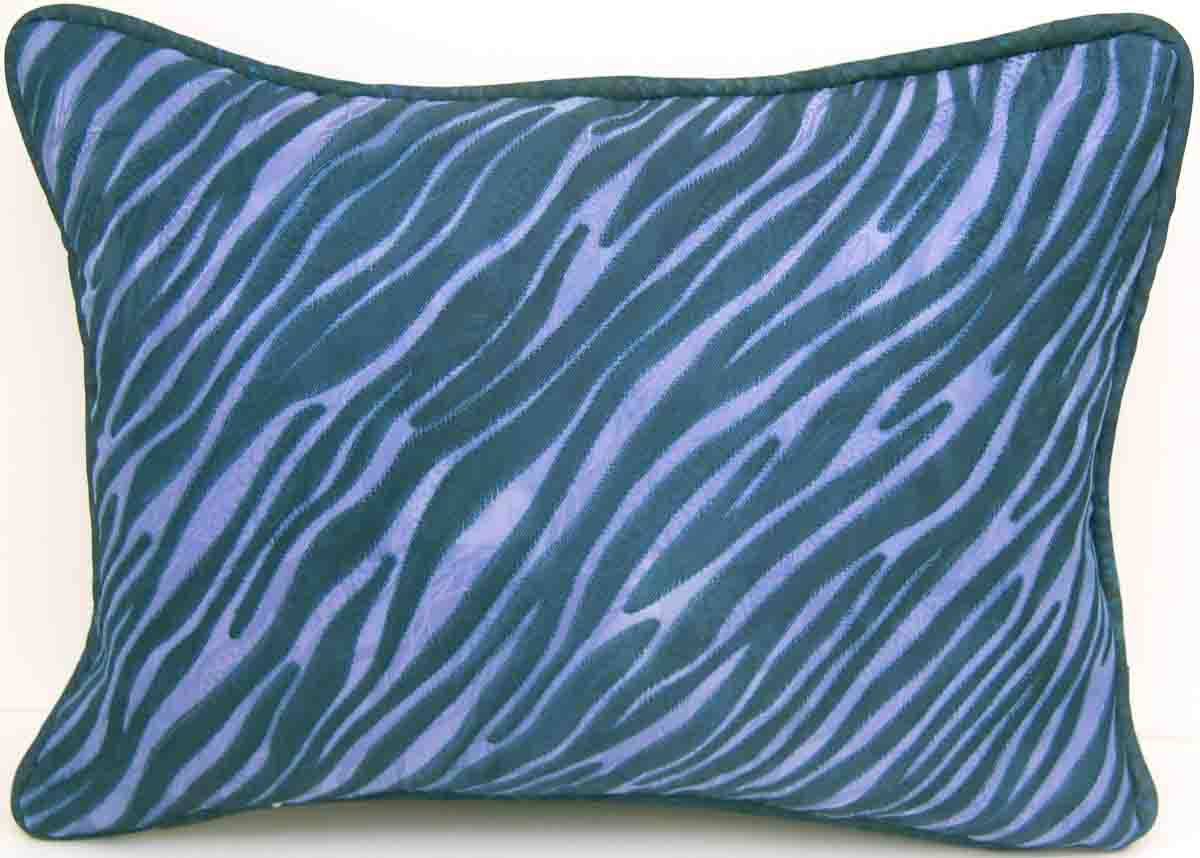
Butterfly Pillow, back side
The zipper is on the bottom and can't be seen from either side once the pillow form has been inserted.
I decided the pillow form didn't have enough stuffing in it and added more. This resulted in a very puffy pillow, which makes the corners stand up like dog ears. The actual pillow doesn't look so much this way, but it did in the photo. I had a good idea to add more stuffing to the corners of the pillow form, but shouldn't have added any more in the middle. Next time, I'll add less stuffing! (Am I going to unizp the pillow, pull out the pillow form and remove some of the stuffing? I don't think so!)
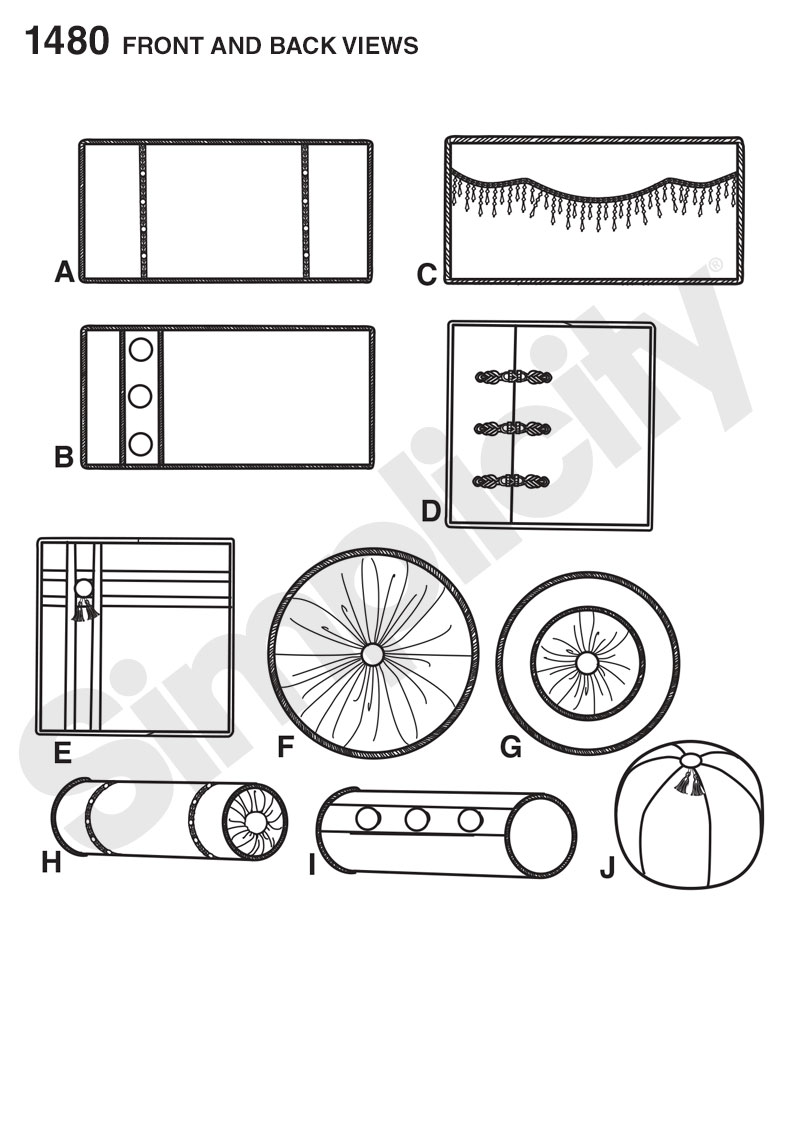
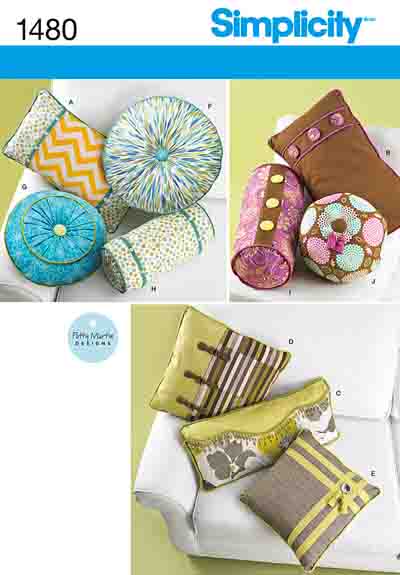
Admittedly, I'm no expert on making pillows but was very pleased with the finished result and loved using my hand-painted cotton and silk fabrics in this way. Although I made my own pattern for this project, there are several sewing patterns available which give more in-depth instruction with drawings for each step. One that I would recommend is pictured below, Simplicity 1480. Pillow "C" was the inspiration for my design, even though I didn't use this pattern. Watch for sales at your local fabric store and you'll be able to get this pattern for $1 or $2.
I would love to make more of these pillows using my hand-painted and hand-dyed fabrics, and hope you'll try it too! (You can click here or on the Fabric button at the top ofthe page to see my hand-dyed and painted fabrics.) Please let me know if you have any questions about my instructions.